Did you know that the air inside your car can be up to six times dirtier than the air outside? Essentially, allergens and dirt can come into your vehicle and become trapped there. So, every time you drive with your family, you and your loved ones are breathing in these harmful elements. Here are some of the things that happen in your vehicle when you have a clogged cabin air filter:
- The flow of fresh air coming into the system becomes blocked.
- The air coming into the ventilation system of your vehicle gets restricted.
- Your car’s defrosting or air conditioning system will not work as efficiently as it should.
As you can see, there are several issues that can stem from clogged cabin air filters. So, whether you’re looking for brand new vehicles or used Japanese cars for sale, changing the filters is one of the crucial maintenance skills you must learn.
When Is the Right Time to Change Your Cabin Air Filter?
Generally, a vehicle’s cabin air filter must be replaced at least once a year. However, if you live in a highly urbanized city with so much dust, you might need to change it more often. You should also consider how you use your vehicle’s air-conditioning system. When you always set the fan to high, it will shorten the lifespan of your filter.
As a rule of thumb, you should refer to your vehicle’s owner manual. You should be able to get the recommended interval on when to replace your cabin air filter there. However, it is also essential to use your judgement. For instance, if you start to notice a bad smell coming from the air conditioning system, then it is time to check if you need to replace your air filters. If your AC’s efficiency seems weaker, then it might also be a sign telling you to change the filter. You can also examine the filter and if you see that it is black as soot, then it is high time you replace it.
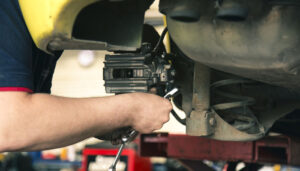
Steps in Changing your Cabin Air Filters
- Open your glove box, then remove its contents.
- On the glove box’s right side, you will find the limiting stop arm. Remove it by sliding it away from the pin.
- Now, you have to remove the glove box. You can do this by grasping its back and front side. Squeeze them toward each other until you feel the side clamps popping free. Once the sides are free, you can put the glove box down. This way, you can expose the faceplate and the cabin air filter channel.
- The next thing you need to do is remove the dirty cabin air filter. You will see the latches on the faceplate’s sides. Slide them out of the way to open up the filter compartment. Pull out the dirty cabin air filter, but remember to be careful not to scatter dirt and dust onto your car’s interior. While you’re removing the filter, check the direction where the arrows are pointing. They indicate the airflow.
- Before you put a new cabin air filter, make sure you clean the chamber thoroughly. Vacuum it and use a damp cloth to wipe away stray contaminants. Take this opportunity to inspect the condition of the seals and gaskets.
- Make sure that you choose a new cabin air filter that matches the one you’re replacing. You should also check if the arrows are pointing to the same direction as the old filter you removed before you slide it in.
- Once you’ve placed the filter, change the faceplate and put the glove box back in place. Do not forget to reinstall the limiting stop.
Whether you have a brand-new vehicle or you’re considering buying one from used Japanese cars for sale ads, you will find this guide useful and easy to follow.