It is not always that you will have someone to help you when your car breaks down. You would not want to get stuck in the middle of nowhere only to realize that you do not have a spare tire or that you do not know any quick fix to the issue in your car. So, in this post, we are going to share some emergency car repair tips that you’ll need to ensure that you are prepared when the unexpected happens.
What are the Emergency Tools to Keep in Your Car?
To ensure that you can keep your car up and running in emergency situations, you need to keep the following emergency car repair tools:
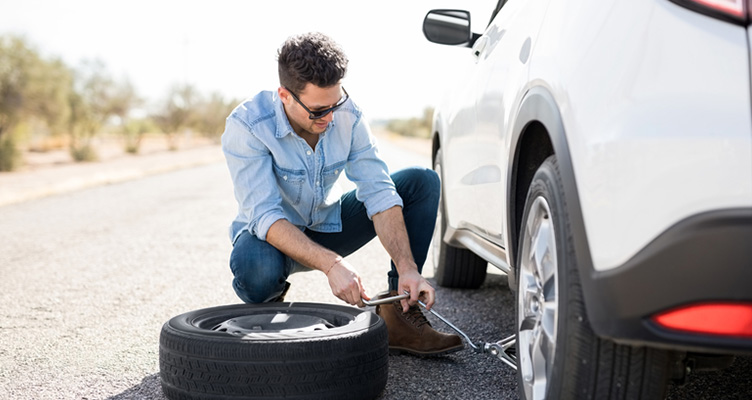
Spare Tire, Tire Jack, and Tire Iron
Remember that you need to be able to change your flat tire on your own. So, you’ll need the tire jack and iron with you. Without them, then the spare tire will be useless. Moreover, if you always keep the special security key for the wheels in your car, if applicable.
Tire Inflator and Sealer
Keeping these two items in your vehicle can ensure that you will be able to plug any air leaks in your tires. Consequently, you can keep driving until you reach an auto shop.
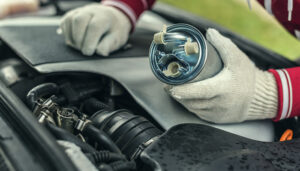
Jumper Cables
Dying batteries can happen even to the best of us. So, it is ideal to keep jumper cables in your trunk. You can also pack an emergency battery booster. This way, you won’t have to wait for another driver to come along before you can jump-start your battery.
Owner’s Manual
Of course, you should always keep your car’s manual inside your glove compartment. This booklet can help you identify and fix basic issues in your vehicle.
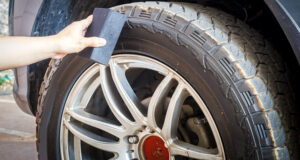
Tire Pressure Gauge
It is ideal to address tire issues before they blow out. So, a tire pressure gauge is one of the tools to keep in your car at all times. Having one ensures that you will be able to fix under-inflated tires as soon as the symptoms start to show.
Reflective Triangle or Flares
You have to ensure that you are still visible at the side of the road when you pull over. Reflective triangles or flares can prevent you from getting hit by other vehicles.
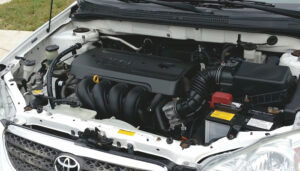
How to Check Your Engine Oil
Whether you purchased your car from a dealership or from an online used car auction, its oil is the lifeblood of its engine. Without it, your engine will start to burn up. Before your engine seizes, you should be able to ensure that you have sufficient engine oil. So, here are the instructions on how to check your engine oil:
- Check your owner’s manual to know the recommended engine oil levels. If you do not know where to find the dipstick, you can check the manual to get the information.
- Park your car on level ground and switch off the engine. Make sure that the engine is cooled down completely before proceeding to the next step.
- Open the hood of your car and locate the dipstick.
- Wipe off any oil from the end of the dipstick, then insert it into its tube, pushing it all the way back in.
- Pull the dipstick out, then check its sides to see where the oil’s end is. Consult your manual to know the recommended level.
- If the engine oil sits below the minimum mark, you need to add more fluid as described in your owner’s manual.
How to Change a Flat Tire
- The first thing you need to do is park your vehicle on level ground.
- Remember to put on the parking brake and the warning device.
- Place the wheel wedges, then detach the hubcap.
- Take your wrench to loosen the lug nuts, but do not remove them completely.
- Put the jack beneath the frame of your car.
- Use the jack to lift your car, then remove the loosened lug nuts. Keep the nuts in a safe location.
- Detach the flat tire, then mount the spare.
- Put back the lug nuts, then tighten them by hand.
- Lower your vehicle slightly until the new tire touches the ground. Note: Do not lower your car all the way.
- Take your wrench, then start tightening the nuts. Instead of tightening the nut that is adjacent to the first one you worked on, it is best that you move on to the one that sits opposite.
- Start lowering the car all the way, then re-tighten the lugs.
- Replace the hubcap, then check if the new tire needs air.
How to Jumpstart your Car
It is worth noting that the specific details on jumpstarting batteries vary from car to car. So, it is crucial that you consult your owner’s manual when performing this procedure. That said, here are the general instructions:
- Ensure that the two batteries have similar voltage. Otherwise, you might damage the electrical components once you jumpstart the car.
- Move the two vehicles close together, but prevent them from touching each other.
- Switch off the cars and place them in ‘Park’ position. Connect the jumper cables following the order below:
- Take the red clamp and connect it to the ‘dead’ battery’s positive (+) post.
- Take the other red clamp and connect it to the good battery’s positive (+) post.
- Take the black-end clamp and connect it to the good battery’s negative (-) post.
- Make sure that the other black-end clamp is connected to some large metallic part of the engine block of your car. Do not attach it to the ‘dead’ battery’s negative (-) post. Doing so will cause sparking that will ignite battery gases.
- Get the working car to run at idling speed for a couple of minutes. After that, try starting the ‘dead’ car. Once your ‘dead’ car is functioning, disconnect the jumper cables in reverse order.
There you have it… some of the essential emergency car repair tips you’ll need in case your vehicle breaks down unexpectedly. Now that you know how to handle unprecedented situations like this, it is time for you to get your very own used car! Click the button below to start bidding on premium quality yet highly affordable pre-owned vehicles!